classic shortbread

shortbread

I know. It’s been a while since I’ve blogged. Far too long. All I can say is that I have two dogs that seem to have taken over my life.

Larry & Mila aka "the bears"

Larry & Mila aka “the bears”

Aren’t they just the cutest?

So as you can see – my snuggle bears keep me busy. But don’t worry. I haven’t abandoned my baking. Far from it!

Right now I am elbow deep in decadent holiday baking classes at The Urban Element. Every Saturday and Sunday I get to “teach” 16 individuals. People of all ages and varying comfort levels in the kitchen and with baking. Together, we bake close to 1800 cookies and squares. Everyone goes home with 8 dozen baked goods … all in a 5 hour time frame. It’s fun. It’s crazy. It is a little tiring (since I do still have my day job) – but boy do I LOVE it. I heart how enthusiastic everyone is. It’s the kind of day that brings good people, positive attitudes, and a lot of laughs and tasty treats.

I’m so lucky to be able to do this again this year.

When we came up with the baking list for this year we decided to include shortbread. Originally I think I thought we would roll it out or make it a slice cookie. But then I picked up a Donna Hay cookbook. That’s right. This recipe is all in thanks to Donna Hay.

Donna Hay's shortbread

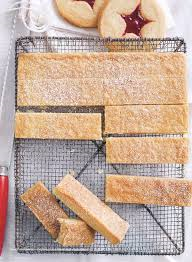
Her picture of her shortbread was so pretty that I knew I needed to try it.

And then the recipe itself was so simple that it was a no brainer.

Honestly. You add all the ingredients to a food processor. Process it together. At first you’ll think nothing is happening and then all of a sudden the dough will gather together… and it’ll be done. Simple perfection.

classic shortbread

Do you think you’re ready to give it a try?

I think you are.

PS. this is so user-friendly you don’t even need a mixing bowl. I mean you can use one if you want … but honestly, I just place everything into my food processor bowl and go. You’ll have hardly any dishes to do … doesn’t that sound like the absolute perfect holiday cookie recipe?

You can click here to watch me demonstrate this on CTV Ottawa Morning Live Friday December 5th, 2014.

classic shortbread

ingredients:

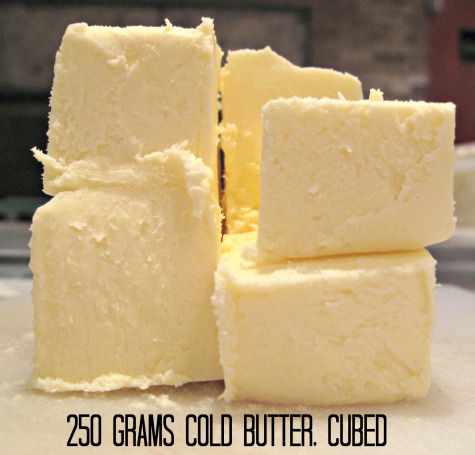
250 g cold butter, cubed

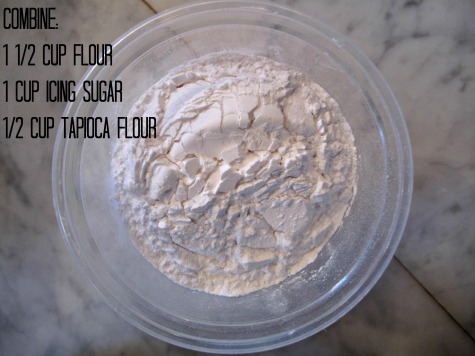
1 1/2 cup flour

1 cup icing sugar

1/2 cup tapioca flour

1 tsp vanilla

butter

dry ingredients

In the bowl of your food processor, using your metal blade, place the butter, flour, icing sugar, tapioca flour and vanilla. Place the lid on your food processor and turn it on. You don’t need to pulse it. Just turn it on and let it go.

Right now you’re probably seeing just a lot of dry ingredients go around and around … and you’re thinking “should I stop it and use a spatula to mix it up?”. Don’t. It’ll come together. Give it a couple of minutes.

Now you are seeing it gather into a ball of dough. See it? It’s pretty perfect isn’t it.

Turn it out onto your counter and knead it all together. No flour required. Just knead it into one ball.

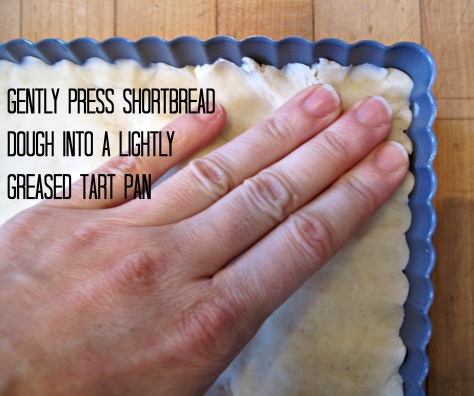
press the dough into your pan

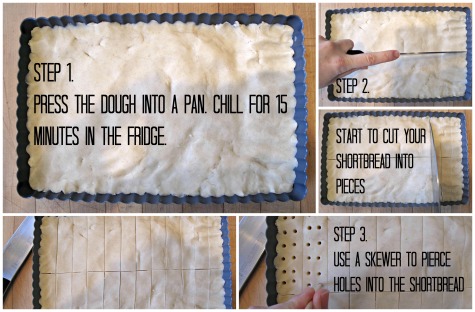
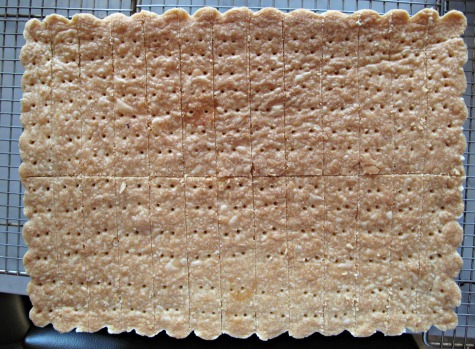
Press the dough into your ready pan (I use basic PAM spray first). I decided this recipe was the perfect opportunity to use my loose bottom rectangular tart pan. I’d get pretty fluted edges that would add to the look of my shortbread. Add the skewered holes to the shortbread and I think mine could pass for Walkers Shortbread. If you don’t have the pan, line a rectangular pan with parchment paper and then press the dough on top. It’s the same idea … only it’s fun to have the pretty edges.

Once it’s been pressed along the base and into the sides and edges of your pan, allow your dough to rest in the fridge for 15 minutes.

This is a great time to turn your oven to 350 F in order to heat it.

When you’re ready to take it out of the fridge (after its resting time) the fun starts. At least I think it’s pretty fun.

creating the "walker" shortbread

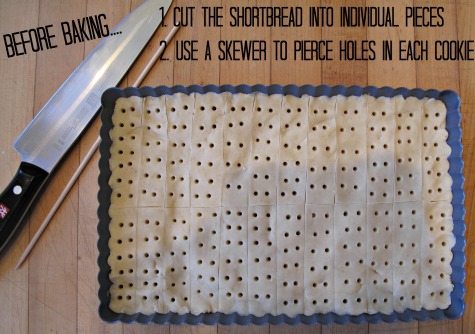
Cut your shortbread. If using a rectangular pan you will likely want to cut the dough in half and then cut slices into that. I’m able to get 24 cookies in my 14 x 5 inch tart pan. You can use a round pan too! I simply encourage you to also place a round cookie cutter in the middle. That means your tips won’t ever break off – and you end up with an extra round shortbread cookie!

before baking

Use a skewer to pierce holes into your shortbread. This creates a really pretty effect.

Now you’re ready to bake it for 35 minutes. I always bake it on my upper-middle rack. I haven’t had to worry about the bottom not being cooked enough and it gets my top a little golden brown as well.

When the time is up … remove the pan from the oven.

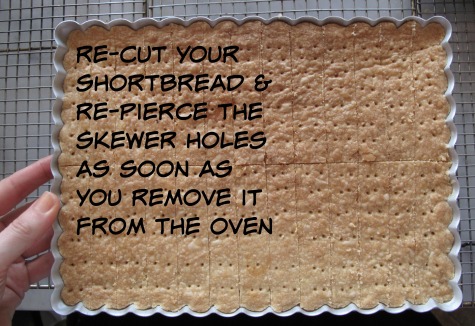
after baking

And re-cut all those cookies you already cut out. If you do it while it’s still hot, you don’t end up with brittle edges. If my holes aren’t as pronounced I will re-skewer the holes too. But that might be a little OCD.

Now for the reason why I really love the loose bottomed pan.

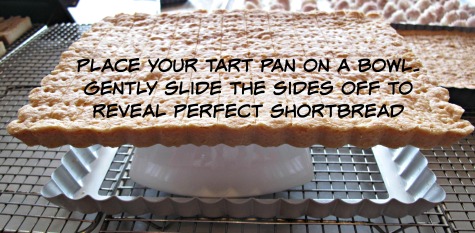
removing the side of the pan

Rather than allow the cookies to cool in the pan, I’m able to simply slip the sides off the pan and allow the cookies to cool on on a wire rack (they are still sitting on the loose bottom). I leave the cookies for a few minutes because they are very delicate – but I find that without the sides on the tart pan, it doesn’t over-bake the sides of the shortbread.

allow to cool

Allow the shortbread to cool and then gently remove them from the base.

shortbread

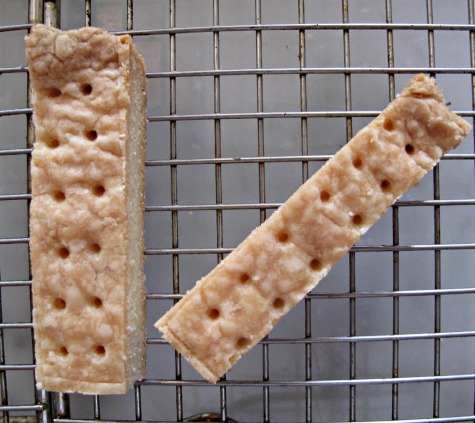
You end up with little sticks of cookies. I like that they are quite thick – but not dry. They have a crunch on the outside, yet they still melt when you bite into them. A brilliantly lovely shortbread recipe.

We have changed it up a bit for the decadent holiday baking classes. Rather than a classic shortbread we bake orange cardamom shortbread. A beautiful, citrus and spicy buttery cookie – perfect for an afternoon tea break. Simply add 1/2 tsp of cardamom and the zest of one orange to your shortbread ingredients.

I’ve also swapped out the orange and the cardamom and made these with a chai spice mix. That just might be my absolute favourite version of this cookie. I’ll be making those for my own family this year … and likely dipping them in chocolate as well. Why not twist up a classic?


mini savory potato, leek, bacon & goat cheese tarts

I haven’t been blogging.

It’s not that I haven’t been baking. Believe me. I’ve been baking. A LOT. It’s just that sometimes I don’t have the time to follow through with a blog post.

But I miss it. I miss my ramblings. I miss telling y’all what I’m up to. I miss seeing your comments. I also miss thinking that my blog is inspiring y’all to bake.

So let’s give this another go.

ba

Last night I decided to pair up a kale chopped chicken salad (Kelly from the Gouda Life’s recipe) with a savory tart. Basically I made mini quiches. But since the manfriend isn’t a fan of quiche, I figured if I call it the “mini savory tart” he’ll think it’s pretty delicious and gobble it up.

I was correct.

Mini quiches would not have been a success. HOWEVER the mini tart was. And man was it good.

baconthinly sliced leekthinly sliced new potato

Thinly sliced new potatoes, leeks and bacon topped with a crème fraiche filling. Encased in a light and flakey pastry shell. Topped with a slice of goats cheese brie.

This tart packed a punch. A punch of amazingness.

The beauty of this recipe is that it’s great for dinner. But I’m also going to have leftovers for lunch today. And it’d be great for a brunch.

Maybe a Mother’s Day brunch? Good thing I’m sharing the recipe now eh? You can make it at home and impress mom.

mini savory potato, bacon & leek tarts

pastry dough

ingredients:

2 c. flour

1 tsp salt

¾ c. COLD butter, cubed

6-7 tbsp COLD heavy cream (or ice water)

eggwash:

1 egg, beaten

1 tsp salt

*this recipe makes enough for 24 mini tarts. So divide in half for the purposes of this recipe – freeze the rest. That way your dough is already ready when you want to bake more mini tarts!

Place the flour and salt into the bowl of your food processor (obviously this can also be made by hand, however, I really do like how my pastry turns out when I use the food processor). Pulse a couple of times to incorporate the dry ingredients.

Add all the cold butter.

Pulse again a few times – you still want pea-sized clumps of butter. Don’t pulse it too much.

Add the cold heavy cream, about 2 tbsp at a time. You’ll see that the dough will start to come together. You want it to hold together when pinched between your fingers, but still loose.

Dump the dough out of the bowl, gather it together and then wrap it in plastic wrap and chill in the fridge for at least 1 hour.

Get the filling and savory ingredients together.

crème fraiche filling:

7 ounces crème fraiche

2 eggs

Sea salt & pepper

¼ of a whole nutmeg, grated

savory ingredients:

4 mini potatoes, boiled and thinly sliced

½ leek, white part thinly sliced

2 slices of bacon, cooked, cooled on a paper napkin to soak oil, then chopped into pieces

Goat cheese brie, cut into wedges

Remove the dough from the fridge and generously flour your work surface. Roll out the dough. I always, always, ALWAYS roll my dough in one direction. Then I lift then entire dough, turn it a quarter, and roll it again. Repeat. That way you ensure that your dough doesn’t stick on your surface. And you have more control of the overall thinness achieved.

I use a 12 mini tart pan – so in order to fill each mold, I cut a square of the pastry dough, line the tart pan, trim the edges. Repeat. These tart pans are available just about anywhere … but feel free to use your regular muffin/cupcake pan. It’s the perfect size for individual tarts. Remember, we aren’t making bite-sized tarts, so no mini muffin tins this time!

Line each tart shell with a cupcake liner and then fill with chickpeas. Place the pan in your fridge for 30 minutes. This allows the pastry to rest again.

Heat your oven to 375 F.

Blind bake the tart shells for 15 minutes on the lowest rack in your oven.

At the 15 minute mark, take the pan out of the oven. Remove the chickpeas and paper liners and gently brush the entire pastry shell with your egg wash.

Return the shells to the oven, and continue baking on the lower rack for a further 8 minutes (I checked mine after 5 minutes just to be on the safe side).

Once blind baked … fill your tart shells!

layer potato, leek & bacon

Layer the tart shells with potato slices, then slices of leek, the bacon.

cover with creme fraiche

Spoon 3 tablespoons worth of filling over each tart shell. Add more if you have leftover filling. Use it all.

Top each tart with a wedge of cheese.

topped with brie - close up

Bake for 25 minutes on the upper rack in your oven (the bottom of your tart shells already baked, now you want the rest of it too).

baked tarts!

When done – remove from the oven and allow to cool completely before digging into the tart. They really are best at room temperature. Then try to eat just one. I bet you can’t. Which is why you should probably double the filling recipe and make 2 dozen of these. You’ll be happy you did. I promise.


double chocolate tart

Oh my goodness. I’ve just realized that it’s Valentine’s day and I haven’t posted a recipe yet.

Which is such a shame because this recipe … it kinda TOTALLY rocks!

double chocolate tart

It’s all about a rich chocolate mousse encased in a dark chocolate pastry shell and then topped with light meringue: torched to perfection. Consider it a s’mores tart only without any graham crackers. Or marshmallows. So not a s’mores tart at all. It’s a double chocolate tart made for lovers. Or non-lovers. Or platonic friends. It’s a tart that shows that *special* someone that you care about them; and that you want them to eat something delicious on the *most* romantic day of the year.

You might think it’ll be too sweet.  It’s not.

You might think it’ll be too decadent. It’s not.

You might think you can’t possibly make it. You can.

All you need to do is break it down into three simple steps:

Chocolate pastry dough – easy

Chocolate mousse filling – super easy

Meringue – simple

That’s it. I have faith that you can make this. Quite frankly, this is a good tart. You should make it for that reason alone. Forget Valentine’s day; bake this because you love to bake and you love chocolate.

double chocolate tart

ingredients:

¼ c. cocoa powder

1 ½ c. flour

125 g cold butter, cubed

½ c. icing sugar

3 egg yolks (save the egg whites for the meringue)

1 tbsp iced water

1 egg white

chocolate pastry dough ingredients

Place the cocoa, flour, butter and icing sugar in the bowl of a food processor (using the dough blade) and process until the mixture is incorporated. Not quite breadcrumbs, slightly larger than that.

While the motor is running, add the egg yolks. Once they have been incorporated, add the iced water. You’ll notice that this is when the dough really comes together.

ps – you’ll notice that in the photo above I added the egg yolks at the beginning. no big deal. the pastry still comes together.

patting the dough into the tart pan

That’s it. You’re done. Place the pastry dough in your tart pan – I start by putting it all in the middle of the pan and then by using my fingertips, I gently press the dough along the base and up the sides. I’ll be honest, I get enough pastry dough to line both a 9-inch tart pan and a 9 x 3 rectangular tart pan.

unbaked tart shell

Brush the tart base with your lightly beaten egg white and then chill for 20 minutes.

Heat your oven to 325 F.

When you’re about ready to pre-bake the tart shell, use a fork to pierce the top of the dough – go crazy! You want to ensure that the dough doesn’t puff up as it bakes, so pierce away!

Bake on a low rack in your oven for 20 minutes. Remove from the oven and allow to cool completely.

Time to make the decadent chocolate mousse.

chocolate mousse

ingredients:

2 tbsp butter

4 ounces semisweet chocolate, chopped

3 eggs, separated

¼ c. sugar

½ c. heavy cream

½ tsp vanilla

Using a double boiler, melt the butter and chocolate together. Once the chocolate has melted, remove the bowl from the heat and beat the chocolate with a wooden spoon until smooth.

Transfer chocolate to another bowl, use a whisk to beat in the egg yolks. Cover the bowl with plastic wrap and chill.

Beat the egg whites with half the sugar (2 tbsp) until they hold stiff peaks. Set aside. Beat the heavy cream with the remaining 2 tbsp of sugar and the vanilla until it holds in soft peaks.

Remove the chocolate from the fridge and spoon a third of the egg whites into the chocolate mixture. It will lighten the chocolate a bit. Fold in the remaining egg whites, a little at a time. You want to be gentle because this is where the airiness of the mousse comes from.

Fold in the cream.

Refrigerate until chilled, and slightly thickened. This isn’t a very stiff mousse, but it does become gorgeously thick as it chills.

Fill the pastry shell with the chocolate mousse. Return to the fridge while you make the meringue.

layer of mousse

bakers note: I decided not to make an Italian or Swiss meringue for this tart and stuck with the traditional French meringue. Any of the meringue types will work – this is just the simplest version.

meringue

ingredients:

3 egg whites

good pinch of cream of tartar

1/3 c. sugar

In the bowl of a stand-mixer, using the whisk attachment, slowly start to beat the eggs until they foam, add the cream of tartar. Increase the speed until you’re at medium-high speed, and slowly add the sugar. Once the sugar is fully incorporated, increase the speed to as high as it’ll go. Beat until you get stiff peaks when you lift the whisk attachment out of the bowl.

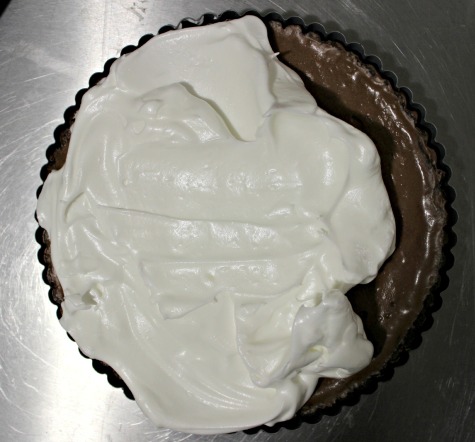
layer of meringue on chocolate mousse

completely covered in meringue

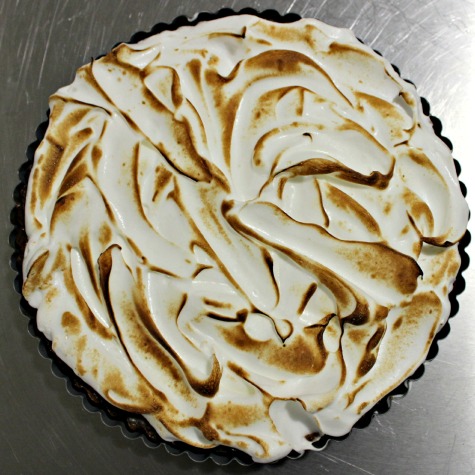
Cover the layer of chocolate mousse with the meringue; then grab that torch of yours – and torch the meringue until it’s toasty and golden!

torhced

Chill your tart in the fridge until you’re ready to eat.