classic shortbread

shortbread

I know. It’s been a while since I’ve blogged. Far too long. All I can say is that I have two dogs that seem to have taken over my life.

Larry & Mila aka "the bears"

Larry & Mila aka “the bears”

Aren’t they just the cutest?

So as you can see – my snuggle bears keep me busy. But don’t worry. I haven’t abandoned my baking. Far from it!

Right now I am elbow deep in decadent holiday baking classes at The Urban Element. Every Saturday and Sunday I get to “teach” 16 individuals. People of all ages and varying comfort levels in the kitchen and with baking. Together, we bake close to 1800 cookies and squares. Everyone goes home with 8 dozen baked goods … all in a 5 hour time frame. It’s fun. It’s crazy. It is a little tiring (since I do still have my day job) – but boy do I LOVE it. I heart how enthusiastic everyone is. It’s the kind of day that brings good people, positive attitudes, and a lot of laughs and tasty treats.

I’m so lucky to be able to do this again this year.

When we came up with the baking list for this year we decided to include shortbread. Originally I think I thought we would roll it out or make it a slice cookie. But then I picked up a Donna Hay cookbook. That’s right. This recipe is all in thanks to Donna Hay.

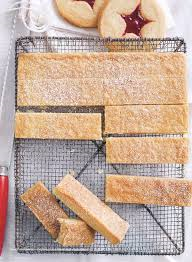
Donna Hay's shortbread

Her picture of her shortbread was so pretty that I knew I needed to try it.

And then the recipe itself was so simple that it was a no brainer.

Honestly. You add all the ingredients to a food processor. Process it together. At first you’ll think nothing is happening and then all of a sudden the dough will gather together… and it’ll be done. Simple perfection.

classic shortbread

Do you think you’re ready to give it a try?

I think you are.

PS. this is so user-friendly you don’t even need a mixing bowl. I mean you can use one if you want … but honestly, I just place everything into my food processor bowl and go. You’ll have hardly any dishes to do … doesn’t that sound like the absolute perfect holiday cookie recipe?

You can click here to watch me demonstrate this on CTV Ottawa Morning Live Friday December 5th, 2014.

classic shortbread

ingredients:

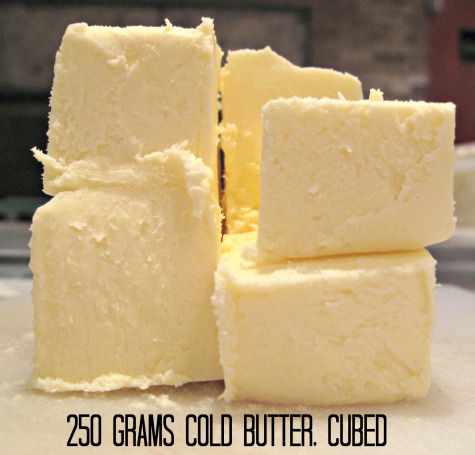
250 g cold butter, cubed

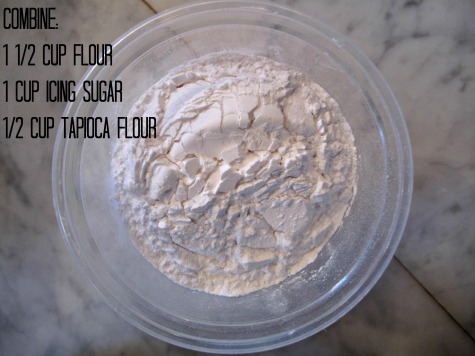
1 1/2 cup flour

1 cup icing sugar

1/2 cup tapioca flour

1 tsp vanilla

butter

dry ingredients

In the bowl of your food processor, using your metal blade, place the butter, flour, icing sugar, tapioca flour and vanilla. Place the lid on your food processor and turn it on. You don’t need to pulse it. Just turn it on and let it go.

Right now you’re probably seeing just a lot of dry ingredients go around and around … and you’re thinking “should I stop it and use a spatula to mix it up?”. Don’t. It’ll come together. Give it a couple of minutes.

Now you are seeing it gather into a ball of dough. See it? It’s pretty perfect isn’t it.

Turn it out onto your counter and knead it all together. No flour required. Just knead it into one ball.

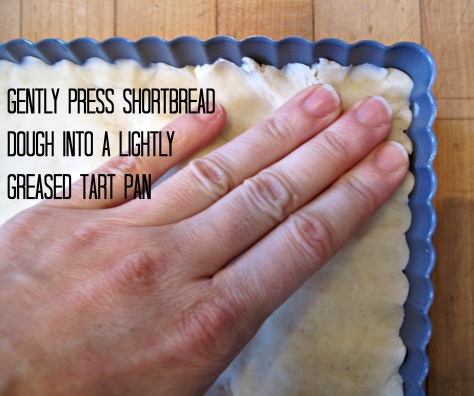
press the dough into your pan

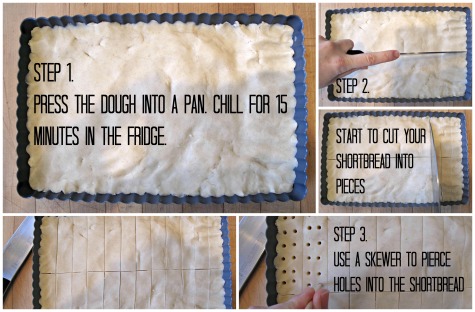
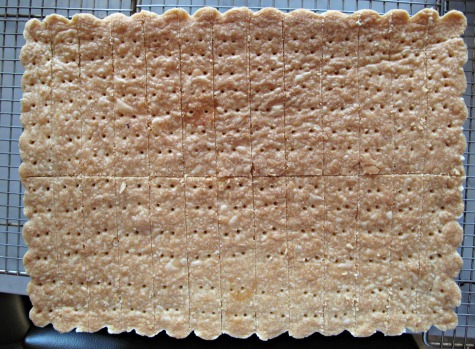
Press the dough into your ready pan (I use basic PAM spray first). I decided this recipe was the perfect opportunity to use my loose bottom rectangular tart pan. I’d get pretty fluted edges that would add to the look of my shortbread. Add the skewered holes to the shortbread and I think mine could pass for Walkers Shortbread. If you don’t have the pan, line a rectangular pan with parchment paper and then press the dough on top. It’s the same idea … only it’s fun to have the pretty edges.

Once it’s been pressed along the base and into the sides and edges of your pan, allow your dough to rest in the fridge for 15 minutes.

This is a great time to turn your oven to 350 F in order to heat it.

When you’re ready to take it out of the fridge (after its resting time) the fun starts. At least I think it’s pretty fun.

creating the "walker" shortbread

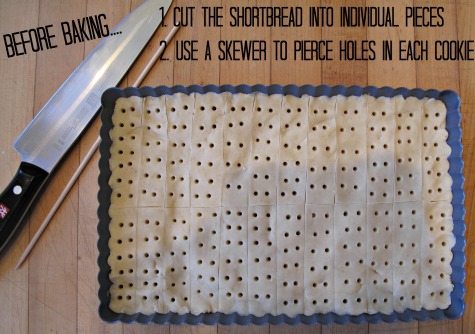
Cut your shortbread. If using a rectangular pan you will likely want to cut the dough in half and then cut slices into that. I’m able to get 24 cookies in my 14 x 5 inch tart pan. You can use a round pan too! I simply encourage you to also place a round cookie cutter in the middle. That means your tips won’t ever break off – and you end up with an extra round shortbread cookie!

before baking

Use a skewer to pierce holes into your shortbread. This creates a really pretty effect.

Now you’re ready to bake it for 35 minutes. I always bake it on my upper-middle rack. I haven’t had to worry about the bottom not being cooked enough and it gets my top a little golden brown as well.

When the time is up … remove the pan from the oven.

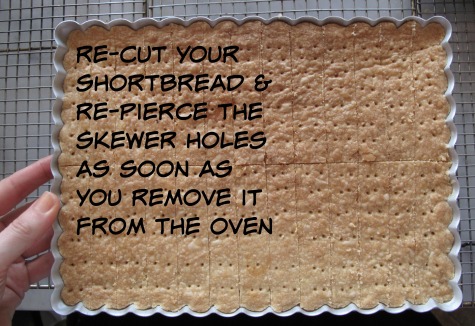
after baking

And re-cut all those cookies you already cut out. If you do it while it’s still hot, you don’t end up with brittle edges. If my holes aren’t as pronounced I will re-skewer the holes too. But that might be a little OCD.

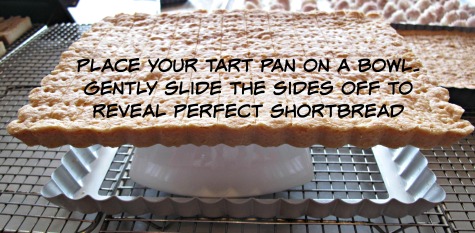
Now for the reason why I really love the loose bottomed pan.

removing the side of the pan

Rather than allow the cookies to cool in the pan, I’m able to simply slip the sides off the pan and allow the cookies to cool on on a wire rack (they are still sitting on the loose bottom). I leave the cookies for a few minutes because they are very delicate – but I find that without the sides on the tart pan, it doesn’t over-bake the sides of the shortbread.

allow to cool

Allow the shortbread to cool and then gently remove them from the base.

shortbread

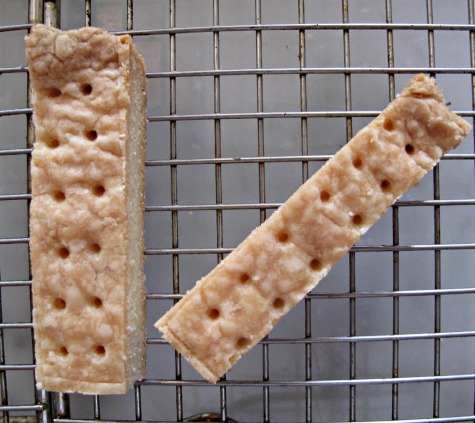
You end up with little sticks of cookies. I like that they are quite thick – but not dry. They have a crunch on the outside, yet they still melt when you bite into them. A brilliantly lovely shortbread recipe.

We have changed it up a bit for the decadent holiday baking classes. Rather than a classic shortbread we bake orange cardamom shortbread. A beautiful, citrus and spicy buttery cookie – perfect for an afternoon tea break. Simply add 1/2 tsp of cardamom and the zest of one orange to your shortbread ingredients.

I’ve also swapped out the orange and the cardamom and made these with a chai spice mix. That just might be my absolute favourite version of this cookie. I’ll be making those for my own family this year … and likely dipping them in chocolate as well. Why not twist up a classic?


lemon meringue cake

Mother of all things lemon and meringue.

I heart this cake!

That’s right.  I decided that although I love lemon meringue pie … sometimes one must celebrate an occasion with cake. 

Saturday night was one of those occasions.  A 40th birthday bash which required cake.  But not just any cake would do … oh no! 

It had to be tart. And fresh. With a (good) splash of lemoncello. And topped with a soft meringue. 

It could only be one thing. 

A lemon meringue cake.

I had previously spotted a similar cake on donna hay’s website.  She had created a chocolate cake bottomed cake … which I will admit – looks stellar in the pictures: the bright white meringue atop brilliant yellow curd and the dark chocolate shell … very pretty … just not what I wanted … flavour-wise.  I needed to punch up the lemon factor for this birthday gal.

I’m thrilled with how it all turned out.

And it really couldn’t have been any easier.  All you need is one layer of cake, some lemon curd, and meringue.  Easy?  Heck ya!

For this recipe … I ended up using my grandmother’s lemon curd recipe.  Recently I’ve been using little red kitsch’n lemon curd recipe – but I wanted to go back to my old school recipe … my grandmother’s lemon curd … with a generous splash of lemoncello.  Plus … I needed egg whites for the meringue … and this curd recipe only uses egg yolks.

 lemon meringue cake

ingredients:

lemon cake:

280 g sugar
80 g butter, room temperature
240 g flour
3 tsp baking powder
1/2 tsp salt
2 eggs
1 tsp vanilla
2 lemons, juice and zest
240 mL buttermilk
 
Heat your oven to 350 F.  Spray a 9-inch round cake pan with nonstick spray and set aside.

In the bowl of your stand-mixer, beat the butter, sugar, and lemon zest together.  This will not result in a über creamy mixture.  There isn’t enough butter to sugar ratio … but it will form a pea-like mixture.  That’s good.

In a medium bowl, combine the flour, baking powder and salt together.

Add the dry ingredients to your butter / sugar batter and mix on low-speed.

In a measuring cup, combine the buttermilk, vanilla, lemon juice and eggs together. 

Slowly pour the wet ingredients into your mixing bowl (again, leaving the mixer at low-speed).  Once the eggs have been incorporated into the batter, increase the speed to medium and beat for a further 30 seconds.

Using a spatula, scrape the sides and the bottom of the bowl – ensuring that all the dry ingredients have been incorporated. 

Pour the batter into your prepared cake pan.  Don’t worry if you have a little left over batter – they make excellent mini cupcakes.  Bake for approximately 25 minutes – this obviously depends on how thick a cake you are baking.  I always like to check my cakes at the 20 minute mark … you’ll know it’s ready when the sides start to pull away from the cake pan.

Remove from heat and allow to cool completely.  It’s time to make your lemon curd.

Isabel’s lemon curd:

1 c. sugar
3 tbsp cornstarch
2 tbsp all purpose flour
1 1/2 c. water
1/2 c. lemon juice
1 tbsp (I used more) lemoncello
Zest of an entire lemon
1 tbsp butter
4 egg yolks, lightly beaten (save the whites for your meringue)

In a medium saucepan, whisk together the sugar, cornstarch, flour, water, lemon juice, lemoncello, and lemon zest. Put the pot over medium heat and cook, stirring until it is about to come to a boil and slightly thickens.

Remove it from heat and stir in the butter. Take about 1/2 c. of the mixture and add it to the egg yolks – it’ll temper the yolks and keep them from curdling. Whisk the egg yolks well – once they’re smooth, pour them into the saucepan. Return the pan to the heat and cook it, whisking constantly – bubbles will form in the mixture. At this point – remove your lemon curd from heat, and strain it through a sieve into a clean bowl.  Cover it with plastic wrap and allow to cool in the fridge while you prepare your lemon cake for filling.

When your cake has cooled completely, turn it out of the pan onto a plate.  I decided to make a template of a smaller (6-inch round) cake pan – placing it in the middle of the cake and using a sharp knife to outline the circle.  This created my guideline for spooning out the middle of the cake.

Once my template was marked, I grabbed a small spoon and gently spooned out the majority of the centre of the cake.  You don’t want to remove all of it though!  You need this to be a shell for the lemon curd (since it is replacing the pie crust), and you don’t want a weakened cake base.

Spoon the lemon curd into the “empty” centre of the cake and smooth it over with a knife or spatula. 

You’re almost there …

Meringue:

4 egg whites
1/4 c sugar
pinch of cream of tartar
 
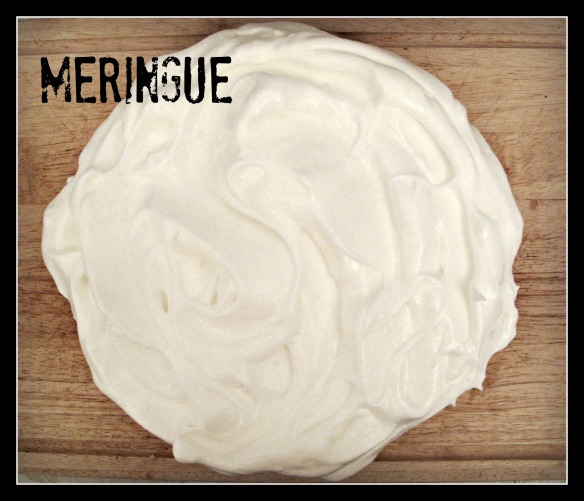
In the bowl of your stand mixer (with the whisk attachment), beat the egg whites on medium-high until foamy. Incorporate the sugar a spoonful at a time, add the pinch of cream of tartar and then increase the speed of the mixer to its highest setting.  You want the egg whites to form glossy peaks … not too stiff … but enough that they hold their shape.

Top the entire cake with the meringue.  Make it pretty!  Use a spoon to create a neat swirly effect.  And then … I blow torched it.  I somehow didn’t remember to take a picture of the finished product before I rushed off to the party … but you can imagine … a beautiful golden meringue. 

Absolute perfection.  And it tasted bloody delicious as well. 

spiced brown sugar cookies

Ok … so I totally meant to post this recipe before Christmas.

It’s true! 

I made it for my Christmas cookie exchange at work,  and I even shared it on Rogers Daytime Ottawa on the 21st (Lois, Tom and I had a blast making these) … with the intention to post the recipe the next day.

Only … I got caught up in some of my holiday baking (scones, monkey bread, cranberry orange upside down cakes, sticky buns, squares, cheesecakes, and lots of lemon meringue tarts) … and blogging was the last thing on my mind.

Until today. 

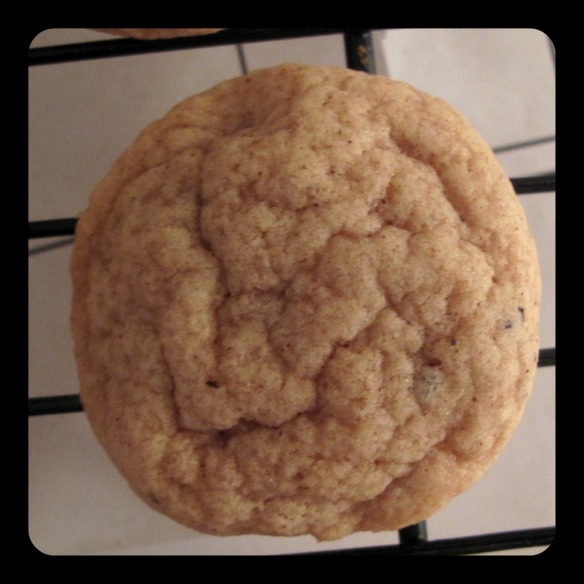
I realized … better late than never with this recipe … it makes a really delightful little cookie … full of spice, a little sweet … a little crunchy yet still soft in the centre.

Mother of pearl I heart this cookie.

Plus … it’s really (and I mean REALLY) good as the base for a lemon cheesecake (the spices and the lemon are a great contrast).    

You see … I’ve re-functioned the cookie for post holidaysjust don’t cover the cookies in the powdered sugar / cinnamon mixture.   

This is another Donna Hay recipe.  I know … my love of Ms. Hay continues (as does my love of her ipad app) … and these cookies certainly solidify her awesomeness. 

I think you’ll like them too.  

spiced brown sugar cookies

ingredients:

1 c. powdered sugar

1 1/2 tsp ground cinnamon

2 1/4 c. flour

1/2 tsp ground ginger

1/2 tsp allspice

1/4 tsp ground cloves

1/4 tsp ground nutmeg

1/4 tsp baking soda

120 g butter, room temperature

1 c. brown sugar

1/3 c. corn syrup

1 egg

1 tsp vanilla

Preheat your oven to 350 F.

Place the icing sugar and ground cinnamon in a bowl and mix well to combine.  Set aside.

In the bowl of your stand-mixer (or with your handheld mixer) beat together the butter, brown sugar, and corn syrup until pale and fluffy – about 3 minutes at medium speed (don’t forget to scrape down the sides of the bowl from time to time).

Add the egg and vanilla to the batter – beating at medium speed to combine well.

Turn off the mixer: add the flour, baking soda and spices, mix in until incorporated.

Roll small amounts of the cookie dough into balls – about the size of a small chocolate truffle.  Place on a cookie sheet (lined with parchment paper), leaving room to spread. 

Bake for 8 minutes – rotating halfway through baking.  You’ll know they are ready when they are slightly cracked. 

Allow the cookies to sit on the baking sheet for 10 minutes.  You want the cookies to still be slightly warm when you coat them in the icing sugar mixture.If you’re making these cookies for a cheesecake base – this is where the recipe ends.  Simply allow to cool, pulse in the food processor to a fine crumb, add some melted butter and mix to combine.  Press into the base of your cheesecake pan.  You won’t be disappointed.  I promise.

However … feel free to make these cookies as they were originally intended … Put the cookies (a few at a time) in the powdered sugar / cinnamon mixture – gently tossing the cookies until they are coated in the sugar.

Place them on a wire rack and allow to cool completely.

Makes 84 truffle sized cookies.  Absolutely delightful cookies!

I’m glad these cookies are my first blog entry in 2012 … a recipe I truly love to share with all of you :0) 

Enjoy … et bonne année!